> ## Documentation Index
> Fetch the complete documentation index at: https://docs.factory.ai/llms.txt
> Use this file to discover all available pages before exploring further.
# JetBrains IDEs
> Use Factory Droid as an AI agent inside JetBrains IDEs via ACP.
## Setup
In any JetBrains IDE (2025.3+) with JetBrains AI (make sure to update to the latest version):
1. Open **Settings > Tools > AI Assistant > Agents** or select **"Install From ACP Registry..."** in the agent picker menu.
2. Find **Factory Droid**.
3. Click **Install**.
4. Open the AI Chat panel and select **Factory Droid** from the agent dropdown.
5. If you are unauthenticated you will see a message indicating you must authenticate.
1. Keep track of the device code rendered, and click the "Login" button.
2. This will open your web browser and ask you to login/signup to Factory, followed by a screen to confirm your device's code.
## (Alternative) Manual Setup
If you prefer to manually configure Droid inside JetBrains, you can follow the instructions below.
1. **Install the Droid CLI (supported on all operating systems except Windows ARM machines)**
* Install via:
```bash theme={null}
curl -fsSL https://app.factory.ai/cli | sh
```
* Ensure the `droid` binary is on your PATH (or note its full path).
2. **(Optional) Factory API key** - instead of using the login flow, you can set up an API key:
* Sign up at [https://app.factory.ai](https://app.factory.ai).
* Add a payment method if prompted.
* Create an API key at [https://app.factory.ai/settings/api-keys](https://app.factory.ai/settings/api-keys).
* Set the `FACTORY_API_KEY` environment variable in your shell (for example, add `export FACTORY_API_KEY=your_key_here` to your shell profile).
You cannot sign up for Factory or manage billing entirely inside JetBrains.
Account creation and API key management always happen in the web app.
### Configure Factory Droid as an Agent
Edit `~/.jetbrains/acp.json` and add a **Factory Droid** entry under `agent_servers`:
```json theme={null}
{
"agent_servers": {
"Factory Droid": {
"command": "*path/to/droid/cli*",
"args": ["exec", "--output-format", "acp"]
}
}
}
```
* `command` – full path to the `droid` binary
* `args` – run Droid in exec mode and speak ACP back to JetBrains
If you prefer to use an API key instead of the login flow, add an `env` block:
```json theme={null}
{
"agent_servers": {
"Factory Droid": {
"command": "*path/to/droid/cli*",
"args": ["exec", "--output-format", "acp"],
"env": {
"FACTORY_API_KEY": "*your API key from https://app.factory.ai/settings/api-keys*"
}
}
}
}
```
## Start a Droid Session in JetBrains
Once the agent server is configured, you interact with Droid entirely through the AI Assistant UI.
### Open the AI Chat Panel
* **Search Everywhere:** Press `Shift`+`Shift`, type **"AI Assistant"**, and open the tool window.
* **Menu:** Go to **View → Tool Windows → AI Assistant** (exact name may vary slightly by IDE).
### Start a New Chat with Factory Droid
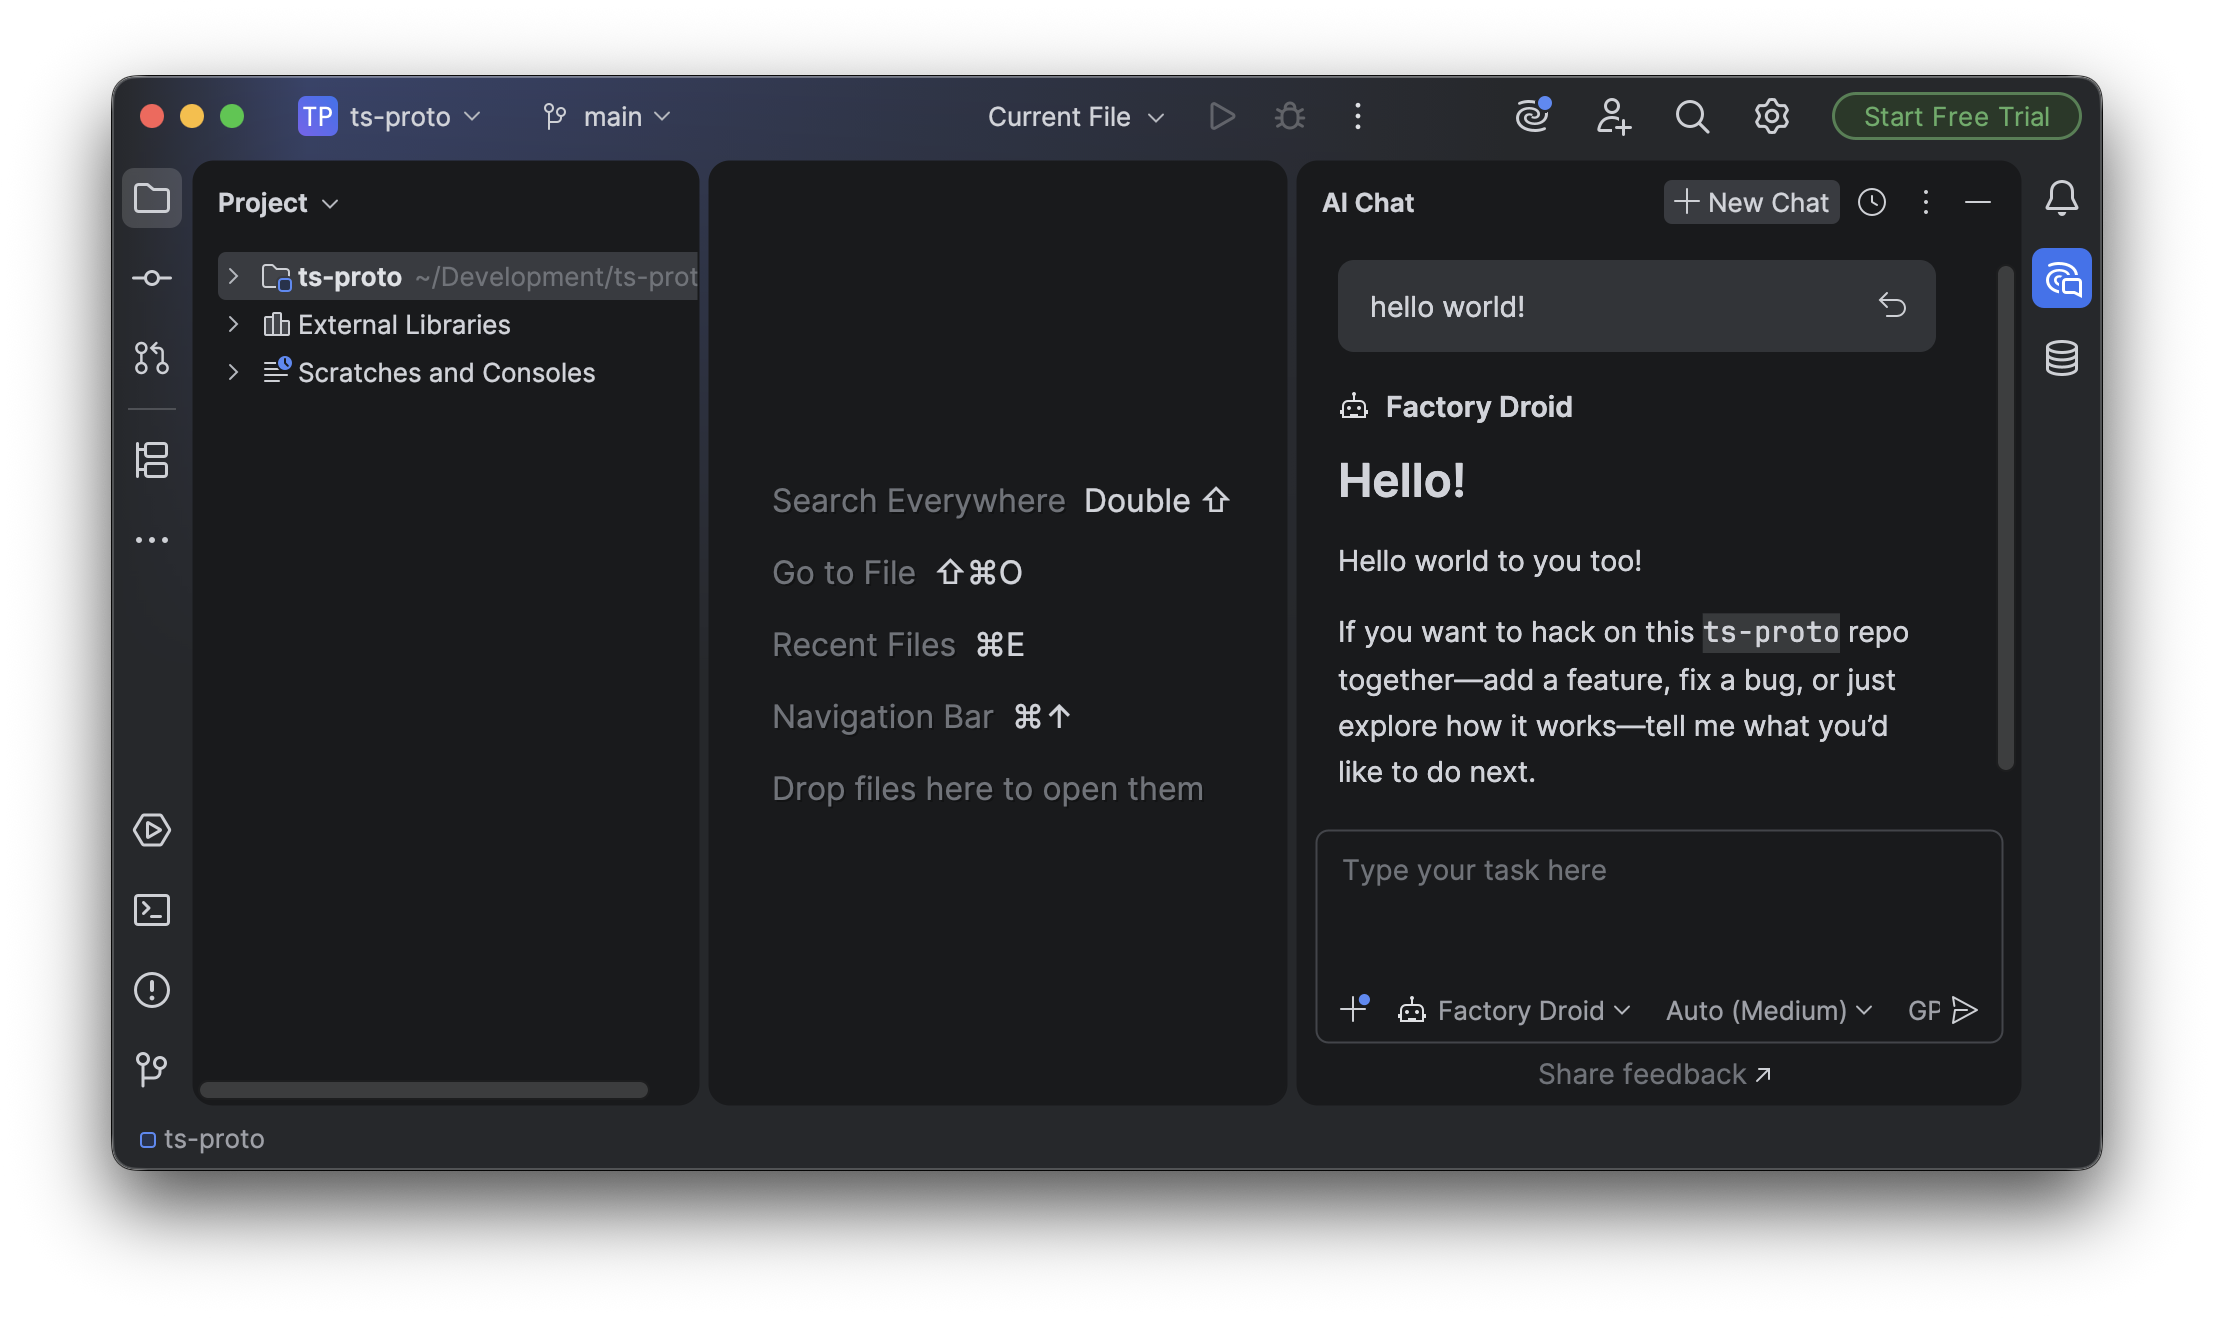
1. In the **AI Chat** panel, click **+ New Chat**.
2. In the bottom-left agent dropdown, choose **Factory Droid**.
3. Start chatting as you would in the CLI.
The session uses your last-selected settings for Factory Droid (model, autonomy level, etc.).
 ## Resume Existing Sessions
JetBrains manages sessions through the AI Chat UI rather than CLI commands.
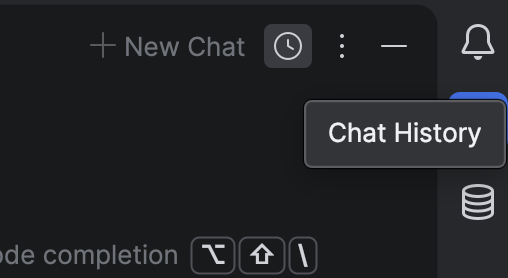
* In the AI Chat panel, click the **clock icon** in the top-right corner.
* Choose a past conversation to reopen it.
## Resume Existing Sessions
JetBrains manages sessions through the AI Chat UI rather than CLI commands.
* In the AI Chat panel, click the **clock icon** in the top-right corner.
* Choose a past conversation to reopen it.
 ## Models and Autonomy Controls
You can change models and autonomy levels directly from the AI Chat footer.
### Switch Models
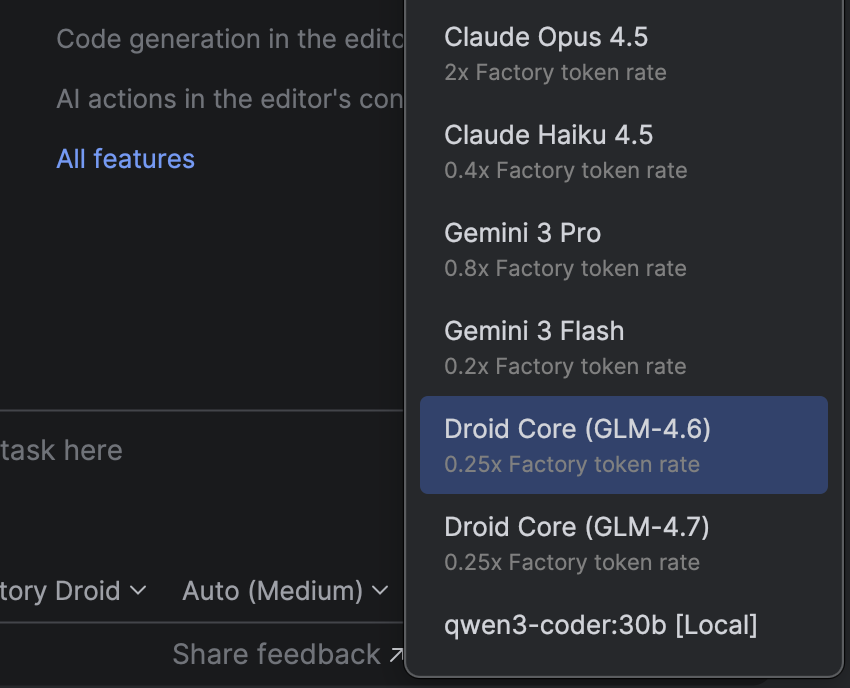
* Use the **model dropdown** at the bottom of the AI Chat panel.
* Pick any Factory-supported model (for example, Claude Opus/Sonnet, GPT-5.1 variants, or others configured via BYOK).
## Models and Autonomy Controls
You can change models and autonomy levels directly from the AI Chat footer.
### Switch Models
* Use the **model dropdown** at the bottom of the AI Chat panel.
* Pick any Factory-supported model (for example, Claude Opus/Sonnet, GPT-5.1 variants, or others configured via BYOK).
 ### Change Autonomy Level
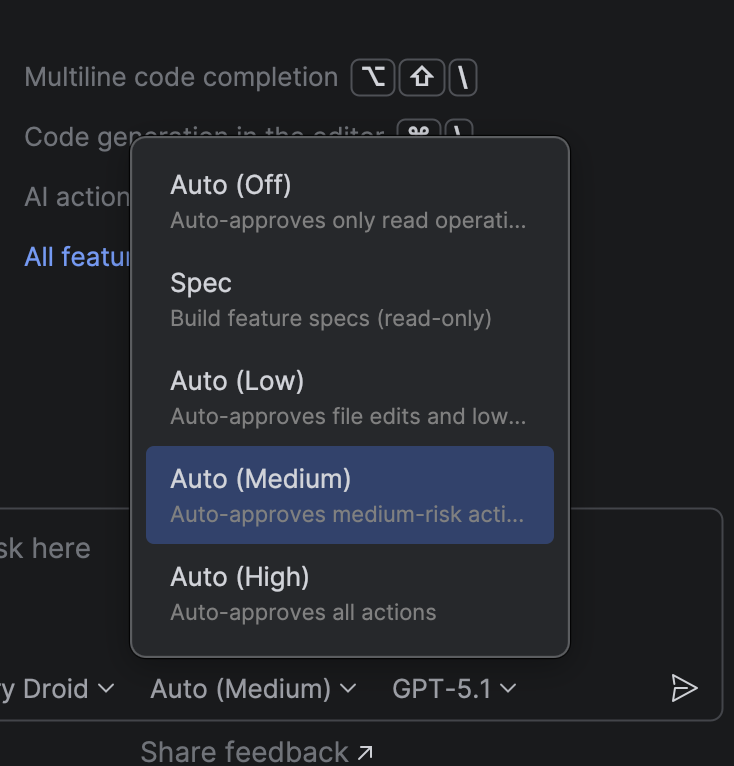
* Use the **autonomy dropdown** next to the model selector.
* Choose the autonomy level that matches your risk tolerance and workflow.
Recommended pattern:
* Start with a **planning-first** flow (low autonomy, spec-style prompts) for medium and large tasks.
* Once you are happy with the plan, increase autonomy to **Auto low** or **Auto medium** so Droid can execute more steps without constant confirmation.
### Change Autonomy Level
* Use the **autonomy dropdown** next to the model selector.
* Choose the autonomy level that matches your risk tolerance and workflow.
Recommended pattern:
* Start with a **planning-first** flow (low autonomy, spec-style prompts) for medium and large tasks.
* Once you are happy with the plan, increase autonomy to **Auto low** or **Auto medium** so Droid can execute more steps without constant confirmation.
 ## Editor Context and Limitations
The current JetBrains integration speaks ACP but does not yet expose full editor context to Droid.
* No automatic sharing of open files, selections, or diagnostics
* No IDE-native diff viewer wired directly to Droid patches
Treat this like a rich chat front-end to the CLI:
* Use clear prompts, reference files by path, and rely on autonomy modes and spec-style planning to manage larger changes.
## Troubleshooting
If Factory Droid does not appear or respond in AI Chat:
* Verify the **CLI**:
* Run `droid exec --output-format acp` in a regular terminal to confirm the binary and API key work.
* Double-check the **agent server configuration**:
* Correct path to `droid`
* `args` includes both `exec` and `--output-format acp`
* `FACTORY_API_KEY` is present and valid
* Confirm you are not on **Windows on ARM**, which is not yet supported.
For MCP-related issues, check that each MCP server’s command, arguments, and environment variables are valid when run outside JetBrains.
## Editor Context and Limitations
The current JetBrains integration speaks ACP but does not yet expose full editor context to Droid.
* No automatic sharing of open files, selections, or diagnostics
* No IDE-native diff viewer wired directly to Droid patches
Treat this like a rich chat front-end to the CLI:
* Use clear prompts, reference files by path, and rely on autonomy modes and spec-style planning to manage larger changes.
## Troubleshooting
If Factory Droid does not appear or respond in AI Chat:
* Verify the **CLI**:
* Run `droid exec --output-format acp` in a regular terminal to confirm the binary and API key work.
* Double-check the **agent server configuration**:
* Correct path to `droid`
* `args` includes both `exec` and `--output-format acp`
* `FACTORY_API_KEY` is present and valid
* Confirm you are not on **Windows on ARM**, which is not yet supported.
For MCP-related issues, check that each MCP server’s command, arguments, and environment variables are valid when run outside JetBrains.